Are you tired of manually lifting your heavy garage door every time you come home? Installing a garage door opener might be the perfect weekend project for you! With the right tools and a bit of patience, you can transform your garage experience and add convenience and security to your home. This comprehensive guide will walk you through everything you need to know about installing a garage door opener yourself.
Before You Begin Your Garage Door Opener Installation In Delaware & Maryland
Check Your Door’s Condition
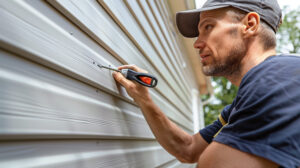
Before diving into your garage door opener installation, make sure your garage door is in good working order. Give your door a manual test run to ensure it moves smoothly without sticking or binding. If you notice resistance or unusual noises, fix these issues first.
Take a moment to inspect all components, including springs, cables, rollers, and hinges, for any signs of wear or damage. Tighten any loose hardware you find.
Remember, a garage door opener won’t fix a damaged door—it might make problems worse. If your door seems unbalanced or damaged, consider consulting a garage door professional before proceeding.
Gather Your Tools for Installing a Garage Door Opener
Having all your tools ready will make your garage door opener installation much smoother. You’ll need:
- Safety glasses (always protect those eyes!)
- A reliable drill with various bits
- A level for precise alignment
- Adjustable locking pliers
- Socket and Phillips driver bits
- A hammer for those stubborn parts
- An open-ended wrench
- A stud finder to locate ceiling joists
- A sturdy ladder for reaching high spots
These tools will be easily available in Delaware & Maryland Hardware stores.
Step-by-Step Garage Door Opener Installation Guide
Step 1: Assemble the Rail System
The rail system is the highway your opener uses to move your door. Here’s how to put it together:
- Unpack all the rail sections and lay them out on a flat surface. Position them so the rail tab faces upward.
- Slide the sections together, connecting the tapered ends into the larger openings until the tabs along the sides lock into place.
- Check that your trolley assembly includes all necessary wear pads (usually four plastic pads inside the inner trolley).
- Slide the trolley onto your newly assembled rail, making sure it’s facing the right direction according to your opener’s instructions.
Step 2: Connect the Rail to the Motor Unit
Now let’s join the rail to the brains of the operation—the motor unit:
- Place your motor unit on some packing material to protect it from scratches.
- Position the “U” bracket flat-side down on the motor unit, lining up the holes.
- Secure the bracket with the provided bolts, but be gentle—overtightening could damage your new opener.
- For chain drive models, attach the chain spreader to the motor unit.
- Insert the appropriate bolt into the cover protection hole at the back end of the rail and secure it with a lock nut.
Step 3: Install the Drive System
Whether you have a chain or belt drive, this step transfers power from the motor to move your door:
- Lay your chain or cable beside the rail following the instructions.
- Pass about 12 inches of cable through the front window of the rail.
- Install the idler pulley into this window, making sure its center is well-greased.
- Insert the idler bolt from the top through both the rail and pulley.
- Secure everything with a lock washer and nut, tightening until the lock washer compresses.
- Double-check that the pulley rotates freely after installation.
For proper tension, spin the inner nut and lock washer down the trolley threaded shaft. Then turn the outer nut to tighten the chain until it sits about 1/4 inch above the base of the rail at its midpoint. Finally, retighten the inner nut to lock in your adjustment.
Don’t worry if you see some chain droop when the door is closed—this is normal! The chain will return to the proper position when the door opens.
Step 4: Mount the Header Bracket
- The header bracket anchors your entire system to the wall:
- Use your stud finder to locate wall studs above your garage door.
- Position the header bracket in the center, directly above your door’s highest travel point.
- Mark and drill pilot holes, then secure the bracket firmly to the wall using lag screws.
This bracket must connect to solid structural components, not just drywall, as it will bear significant force during operation.
Step 5: Secure the Power Unit to the Ceiling
Now it’s time to hang your motor unit:
- Find your ceiling joists using a stud finder.
- Attach perforated angle iron directly to these joists using lag screws.
- Connect short vertical pieces of angle iron to your drive unit.
- Carefully lift the motor unit and secure it to the angle iron with appropriate bolts.
- Check that your entire track assembly is level and properly supported.
This mounting system spreads the weight across multiple joists for maximum stability and safety during operation.
Step 6: Install the Wall Control
For convenient indoor operation:
- Choose a location about 5 feet above the floor where you can see your garage door.
- For a professional-looking installation, create small holes to conceal the wiring—one in the ceiling and another near your intended switch location.
- Use a coat hanger to help fish the wire between the holes.
- Connect the wire to the switch terminals and mount it securely to the wall.
Step 7: Set Up Safety Sensors
Modern openers require safety sensors to prevent accidents:
- Position your infrared sensors on either side of the garage door, approximately 6 inches from the floor.
- Mount them securely, ensuring they align directly across from each other.
- Run the sensor wires back to your motor unit and connect according to instructions.
These sensors create an invisible beam that prevents the door from closing if anything breaks the beam—a crucial safety feature, especially for homes with children or pets.
Step 8: Connect the Door to the Opener
Now for the final mechanical connection:
- Close your garage door and pull the emergency release handle to disconnect the trolley.
- Attach the straight door arm to the trolley using the clevis pin and secure with the ring fastener.
- Connect the curved door arm to the door bracket similarly.
- Bring both arm sections together, find holes that align well, and join them using bolts, nuts, and lock washers.
- For best results, select holes as far apart as possible to increase door arm rigidity.
- Return the emergency release handle toward the opener until the trolley release arm is horizontal.
- For metal garage doors, consider installing a reinforcing bracket first to distribute force across the door panel.
Step 9: Program and Test Your Garage Door Opener
The final step in your garage door opener installation:
- Set travel limits following your manufacturer’s instructions.
- Program safety settings to ensure the door reverses when meeting resistance.
- Set up your remote controls and keypads.
- Test your door by running it through several complete cycles.
- Verify all safety features by placing an object in the path of the sensors during door closure—the door should immediately stop and reverse.
Conclusion
Now that you’ve completed your garage door opener installation, remember that maintenance is key to longevity. The average family opens and closes their garage door 3-5 times daily—that’s about 1,500 cycles per year! Regular lubrication of moving parts and occasional tightening of hardware will keep your opener running smoothly for years to come.
If you ever encounter issues with your installation or notice your door behaving unusually, don’t hesitate to consult us. We offer the best garage door opener services in Delaware and Maryland, and also competitive prices so that your wallet doesn’t take a hit.